example.com. But that platform falls short at blogging. So you think to yourself, “What if I could use a different blogging …
How to Serve a Subdomain as a Subdirectory originally published on CSS-Tricks, which is part of the DigitalOcean family. You should get the newsletter.
]]>example.com. But that platform falls short at blogging. So you think to yourself, “What if I could use a different blogging platform and make it available at example.com/blog?”
Most people would tell you that goes against how DNS and websites are supposed to work and to use a subdomain instead. But there are benefits to keeping your content on the root domain that we just don’t get with subdomains.
There’s a way to serve two different platforms on the same URL. And I’m going to show you the secret sauce so that, by the end of this article, we’ll make blog.example.com serve as example.com/blog.
Why you’d want to do this
Because you’re here, you probably already know why this is a path to pursue. But I’d like to ensure you are here for the primary reason to do this: SEO. Check out these 14 case studies that show positive results when people move their subdomains over to subdirectories. You want your blog and your domain to share SEO value. Putting it on a subdomain would somewhat disconnect the two.
This was my reason, and wound up merging two platforms, where the main domain was on WordPress and the subdomain was on Drupal. But this tutorial is platform agnostic — it’ll work with just about any platform.
That said, the Cloudflare approach we’re covering in this tutorial is incompatible with Shopify unless you pay for Cloudflare’s Enterprise plan. That’s because Shopify also uses Cloudflare and does not allow us to proxy the traffic on their free pricing tier.
Step 0 (Preview)
Before I jump in, I want to explain the high level of what’s going to happen. In short, we’ll have two websites: our main one (example.com) and the subdomain (blog.example.com). I use “blog” as an example, but in my case, I needed to drop in Drupal with a different type of content. But a blog is the typical use case.
This approach relies on using Cloudflare for DNS and a little extra something that’ll provide the magic. We’re going to tell Cloudflare that when someone visits example.com/blog, it should:
- intercept that request (because
example.com/blogdoesn’t really exist), - request a different domain (
blog.example.com/blog) behind the scenes, and - deliver the results from that last step to the visitor masked through
example.com/blog.
Okay, let’s dive into it in more detail!
Step 1: Using Cloudflare
Again, we’re using Cloudflare for the DNS. Pointing your domain’s DNS there is the first step to getting started.
The reason for Cloudflare is that it allows us to create Workers that are capable of running a bit of code anytime somebody visits certain URLs (called Routes which we’ll create in step 3). This code will be responsible for switching the websites behind the scenes.
Cloudflare has an excellent guide to getting started. The goal is to point your domain’s — wherever it is registered — to Cloudflare’s nameservers and confirm that Cloudflare is connected in your Cloudflare account.
Step 2: Create the Worker
This code will be responsible for switching the websites behind the scenes. Head over to Workers and click Create a Service.

.7ms to the request (so basically nothing).Name your service, then select “HTTP handler”:

Click Create Service and then Quick Edit.

Paste in the following code and replace the domain names with your own on line 16:
// Listen for every request and respond with our function.
// Note, this will only run on the routes configured in Cloudflare.
addEventListener('fetch', function(event) {
  event.respondWith(handleRequest(event.request))
})

// Our function to handle the response.
async function handleRequest(request) {
  // Only GET requests work with this proxy.
  if (request.method !== 'GET')
  return MethodNotAllowed(request);
  // The URL that is being requested.
  const url = new URL(request.url);
  // Request "origin URL" aka the real blog instead of what was requested.
  // This switches out the absolute URL leaving the relative path unchanged.
  const originUrl = url.toString().replace('https://example.com', 'https://blog.example.com');
  // The contents of the origin page.
  const originPage = await fetch(originUrl);
  // Give the response our origin page.
  const newResponse = new Response(originPage.body, originPage); return newResponse;
}

// Hey! GET requests only
function MethodNotAllowed(request) {
  return new Response(`Method ${request.method} not allowed.`, {
    status: 405,
    headers: { 'Allow': 'GET' }
  })
}
Lastly, click Save and Deploy.
Step 3: Add Routes
Now let’s inform Cloudflare which URLs (aka Routes) to run this code on. Head over to the website in Cloudflare, then click Workers.
There is the Workers section on the main screen of Cloudflare, where you edit the code, and then there is the Workers section on each website where you add the routes. They are two different places, and it’s confusing.
First off, click Add Route:

Because we are adding a blog that has many child pages, we’ll use https://example.com/blog*. Note the asterisk acts as a wild card for matching. This code will run on the blog page and every page that begins with blog.
This can have unintended consequences. Say, for example, you have a page that starts with “blog” but isn’t a part of the actual blog, like https://example.com/blogging-services. That would get picked up with this rule.
Then, select the Worker in the Service dropdown.
We have a lot of the work done, but there are more routes we need to add — the CSS, JavaScript, and other file paths that the blog is dependent on (unless all the files are hosted on a different URL, such as on a CDN). A good way to find these is by testing your route and checking the console.
Head over to your https://example.com/blog and make sure something is loading. It’ll look messed up because it’s missing the theme files. That’s fine for now, just as long as it’s not producing a 404 error. The important thing is to open up your browser’s DevTools, fire up the console, and make note of all the red URLs it can’t find or load (usually a 404 or 403) that are a part of your domain.

You’ll want to add those as routes… but only do the parent paths. So, if your red URL is https://example.com/wp-content/themes/file1.css, then do https://example.com/wp-content* as your route. You can add a child path, too, if you want to be more specific, but the idea is to use one route to catch most of the files.

Once you add those routes, check out your URL and see if it looks like your subdomain. If it doesn’t, check the previous steps. (Chances are you will need to add more routes.)
It’s best to do a quality check by navigating to multiple pages and seeing if anything is missing. I also recommend opening up DevTools and searching for your subdomain (blog.example.com). If that’s showing up, you either need to add routes to target those resources or do something with your platform to stop outputting those URLs. For example, my platform was outputting a canonical tag with my subdomain, so I found a plugin to modify the canonical URL to be my root domain.
Step 4: The secretest of sauces (noindex)
You might see that we have a problem. Our URLs are available at two different URLs. Yeah, we can use the canonical attribute to inform Google which URL is our “main” one, but let’s not leave it up to Google to pick the right one.
First, set your entire subdomain as noindex (the way to do this will vary by platform). Then, in the Cloudflare Worker, we are going to add the following line of code, which basically says to remove noindex when the current URL is accessed through the proxy.
newResponse.headers.delete("x-robots-tag");The full code solution is provided at the end of this article.
Step 5: Modify the sitemap
The last thing to do is to modify the subdomain’s sitemap so it doesn’t use the subdomain in it. The way to do this will vary by platform, but the goal is to modify the base/absolute/domain in your sitemap so that it prints example.com/mypost) instead of blog.exmaple.com/mypost. Some plugins and modules will allow this without custom code.
That’s that! The solution should be working!
Limitations
This Cloudflare magic isn’t without its downsides. For example, it only accepts GET requests, meaning we can only get things from the server. We are unable to POST which is what forms use. So, if you need to have your visitors log in or submit forms, there will be more work on top of what we’ve already done. I discussed several solutions for this in another article.
As noted earlier, another limitation is that using this approach on Shopify requires subscribing to Cloudflare’s Enterprise pricing tier. Again, that’s because Shopify also uses Cloudflare and restricts the ability to proxy traffic on their other plans.
You also might get some issues if you’re trying to merge two instances of the same platforms together (e.g. both your top-level domain and subdomain use WordPress). But in a case like that you should be able to consolidate and use one instance of the platform.
Full solution
Here’s the code in all its glory:
// Listen for every request and respond with our function.
// Note, this will only run on the routes configured in Cloudflare.
addEventListener('fetch', function(event) {
  event.respondWith(handleRequest(event.request))
})
// Our function to handle the response.
async function handleRequest(request) {
  // Only GET requests work with this proxy.
  if (request.method !== 'GET') return MethodNotAllowed(request);
  // The URL that is being requested.
  const url = new URL(request.url);
  // Request "origin URL" aka the real blog instead of what was requested.
  // This switches out the absolute URL leaving the relative path unchanged.
  const originUrl = url.toString().replace('https://example.com', 'https://blog.example.com');
  // The contents of the origin page.
  const originPage = await fetch(originUrl);
  // Give the response our origin page.
  const newResponse = new Response(originPage.body, originPage);
  // Remove "noindex" from the origin domain.
  newResponse.headers.delete("x-robots-tag");
  // Remove Cloudflare cache as it's meant for WordPress.
  // If you are using Cloudflare APO and your blog isn't WordPress, (but
  // your main domain is), then stop APO from running on your origin URL.
  // newResponse.headers.set("cf-edge-cache", "no-cache"); return newResponse;
}
// Hey! GET requests only
function MethodNotAllowed(request) {
  return new Response(`Method ${request.method} not allowed.`, {
    status: 405,
    headers:
    { 'Allow': 'GET' }
  })
}
If you need help along the way, I welcome you to reach out to me through my website CreateToday.io or check out my YouTube for a video demonstration.
How to Serve a Subdomain as a Subdirectory originally published on CSS-Tricks, which is part of the DigitalOcean family. You should get the newsletter.
]]>The new WebPageTest website design
…
7 Fresh Links on Performance For March 2022 originally published on CSS-Tricks, which is part of the DigitalOcean family. You should get the newsletter.
]]>
- From fonts to SVG: an icon migration strategy— Erwin Hofman notes that he was using icon fonts out of sheer convenience, but that there are loads of reasons not to use them. He provides details on his new strategy for using icons, which is based on the
<use>technique. Five years later, I’m still a big fan of just dunking the<svg>in the HTML where you need them. It’s just an HTML partial like any other. - Next.js Performance: Making a Fast Framework Even Faster— Ben Schwarz says that Next.js is already a pretty fast framework in that it does smart things that keep even React powered pages snappy. But performance isn’t something that can be left entirely to a framework. You have to do work. Fortunately, Next.js has some pretty handy helpers for things like dynamically (lazily) loading components, deferring scripts, optimizing images, and more.
- Redirect Liquidation— Tim Vereecke covers a fascinating technique where instead of redirecting an old URL to a new URL, you let the old URL load, dynamically load the new content, then
history.replaceStatethe old URL with the new URL. It’s faster, but just don’t do it for bots. - Performant A/B Testing with Cloudflare Workers— Philip Walton covers how A/B testing is a little trickier on static sites than server-backed sites, but you can pull it off (performantly) thanks to Cloudflare Workers which can manipulate HTML before it hits the browser, much like a Service Worker except at the edge rather than at the client. Save a cookie and you can maintain users in their proper groups.
- A Unified Theory of Web Performance— Alex Russell tries to answer Tanner Hodges’ call for actually defining web performance. It’s one of those things that seems obvious (like it’s clear when certain things help and hurt web performance) but actually defining it is tricky. And not just defining it in terms of specific metrics (even that is tricky), but answer questions like: What are this discipline’s guiding principles? What does it look like to practice web performance? How do we do it?
- Unveiling the new WebPageTest UI— I absolutely love seeing WebPageTest’s design evolve and improve. It’s one of those products that’s clearly a best-in-class tool for performance practitioners, yet had a prettttty gnarly design for a lot of years. This is way better. It’s like when Google Fonts finally got a redesign and the broad community let out a collective exhale of appreciation.
- Caching Header Best Practices— Simon Hearne’s dissertation on Cache headers. When I first started caring about web performance, this was, like, the main thing. If you incorrectly send Cache headers, users might be re-downloading a file over and over unnecessarily when they don’t need to, which is about the worst thing possible. I’m glad to see headers keep getting attention and re-imagined as the web evolves.
7 Fresh Links on Performance For March 2022 originally published on CSS-Tricks, which is part of the DigitalOcean family. You should get the newsletter.
]]>addEventListener("fetch", (event) ={
event.respondWith(
fetch("https://css-tricks.com")
);
});It doesn’t have any error handling or anything, but hey, it works:
Now imagine how …
Proxying Third-Party JavaScript as First-Party JavaScript (and the Potential Effect on Analytics) originally published on CSS-Tricks, which is part of the DigitalOcean family. You should get the newsletter.
]]>addEventListener("fetch", (event) => {
event.respondWith(
fetch("https://css-tricks.com")
);
});It doesn’t have any error handling or anything, but hey, it works:

Now imagine how some websites give you a URL to JavaScript in order to do stuff. CodePen does this for our Embedded Pens feature.

That URL is:
https://cpwebassets.codepen.io/assets/embed/ei.jsI can proxy that URL just as easily:

Doing nothing special, it even serves up the right content-type header and everything:

Cloudflare Workers gives you a URL for them, which is decently nice, but you can also very easily “Add a Route” to a worker on your own website. So, here I’ll make a URL on CSS-Tricks to serve up that Worker. Lookie lookie, it does just what it says it’s going to do:

So now, I could do….
<script src="/super-real-url/codepen-embeds.js"></script>Right from css-tricks.com and it’ll load that JavaScript. It will look to the browser like first-party JavaScript, but it will really be proxied third-party JavaScript.
Why? Well nobody is going to block your first-party JavaScript. If you were a bit slimy, you could run all your scripts for ads this way to avoid ad blockers. I have mixed feelings there. I feel like if you wanna block ads you should be able to block ads without having to track down specific scripts on specific sites to do that. On the other hand, proxying some third-party resources sometimes seems kinda fine? Like if it’s your own site and you’re just trying to get around some CORS issue… that would be fine.
More in the middle is something like analytics. I recently blogged “Comparing Google Analytics and Plausible Numbers” where I discussed Plausible, a third-party analytics service that “is built for privacy-conscious site owners.” So, ya know, theoretically trustable and not third-party JavaScript that is terribly worrisome. But still, it doesn’t do anything to really help site visitors and is in the broad category of analytics, so I could see it making its way onto blocklists, thus giving you less accurate information over time as more and more people block it.

But as we talked about, very few people are going to block first-party JavaScript, so proxying would theoretically deliver more accurate information. In fact, they have docs for proxying. It’s slightly more involved, and it’s over my head as to exactly why, but hey, it works.
I’ve done this proxying as a test. So now I have data from just using the third-party JavaScript directly (from the last article):
| Metric | Plausible (No Proxy) | Google Analytics |
|---|---|---|
| Unique Visitors | 973k | 841k |
| Pageviews | 1.4m | 1.5m |
| Bounce Rate | 82% | 82% |
| Visit Duration | 1m 31s | 1m 24s |
And can compare it to an identical-in-length time period using the proxy:
| Metric | Plausible (Proxy) | Google Analytics |
|---|---|---|
| Unique Visitors | 1.32m | 895k |
| Pageviews | 2.03m | 1.7m |
| Bounce Rate | 81% | 82% |
| Visit Duration | 1m 35s | 1m 24s |
So the proxy really does highly suggest that doing it that way is far less “blocked” than even out-of-the-box Plausible is. The week tested was 6%¹ busier according to the unchanged Google Analytics. I would have expected to see 15.7% more Unique Visitors that week based on what happened with the non-proxied setup (meaning 1.16m), but instead I saw 1.32m, so the proxy demonstrates a solid 13.8% increase in seeing unique visitors versus a non-proxy setup. And comparing the proxied Plausible setup to Google Analytics directly shows a pretty staggering 32% more unique visitors.
With the non-proxied setup, I actually saw a decrease in pageviews (-6.6%) on Plausible compared to Google Analytics, but with the proxied setup I’m seeing 19.4% more pageviews. So the numbers are pretty wishy-washy but, for this website, suggest something in the ballpark of 20-30% of users blocking Google Analytics.
- I always find it so confusing to figure out the percentage increase between two numbers. The trick that ultimately works for my brain is
(final - initial) / final * 100.
Proxying Third-Party JavaScript as First-Party JavaScript (and the Potential Effect on Analytics) originally published on CSS-Tricks, which is part of the DigitalOcean family. You should get the newsletter.
]]>#203: A First Look at Cloudflare Pages originally published on CSS-Tricks, which is part of the DigitalOcean family. You should get the newsletter.
]]>In this video, Chris is joined by Cloudflare’s Kristian Freeman to play with the product and see how it works. We spin up a Nuxt.js site locally, push it to a GitHub repo, and have Cloudflare Pages pick it up from there and deploy it. Cloudflare Pages knew exactly how to run that build and it worked great. It even builds pull requests against that repo and generates preview URLs.
Then we took an existing Eleventy site I already have in a repo, and followed the steps to deploy it on Cloudflare Pages, which also worked perfectly. It’s a nice touch of Cloudflare Pages that it helps you update the DNS to set up the hosting correctly.
Why pick Cloudflare Pages? They are offering quite a few “unlimited” features: Unlimited sites, unlimited requests, unlimited bandwidth, and as Kristian and I talked about in the video, unlimited and free team member seats. The only thing you pay for is the number of builds (like if you push more than 500 times a month, then you bump up to the next tier for 5,000 builds a month, which is only $20).
We talk about a few other things in the video, like how powerful and useful Cloudflare Workers are and managing permissions with Cloudflare Access.
#203: A First Look at Cloudflare Pages originally published on CSS-Tricks, which is part of the DigitalOcean family. You should get the newsletter.
]]>fetch it, and plunk it onto the page.
Ajax, right? Ugh. …
WordPress-Powered Landing Pages on a Totally Different Site via Cloudflare Workers originally published on CSS-Tricks, which is part of the DigitalOcean family. You should get the newsletter.
]]>fetch it, and plunk it onto the page.
Ajax, right? Ugh. Now we’re in client-side rendered site territory, which isn’t great for performance, speed, or resiliency.
What if we could fetch that content and stitch it into the main page on the server side? Server side isn’t the right word for it though. What if we could do it at the global CDN level? Do it at the edge, as they say. That’s what we’ve been doing at CodePen, so we can build pages with the lovely WordPress block editor but serve them on our main site.
To Shared Link — Permalink on CSS-Tricks
WordPress-Powered Landing Pages on a Totally Different Site via Cloudflare Workers originally published on CSS-Tricks, which is part of the DigitalOcean family. You should get the newsletter.
]]>Flywheel is a sponsor of CSS-Tricks, and I’m glad they are because they make great products. Flywheel is at the heart …
#177: Local WordPress Development to Production Workflow originally published on CSS-Tricks, which is part of the DigitalOcean family. You should get the newsletter.
]]>Flywheel is a sponsor of CSS-Tricks, and I’m glad they are because they make great products. Flywheel is at the heart of this workflow.
First, Local by Flywheel is a tremendously easy way to spin up local WordPress sites to your liking. I use it for all my local WordPress development. It’s a nice UI around little Docker containers.
My WordPress sites are all `wp-content` folders in private GitHub repos though, which is nice for working with other people, tracking issues, using integrations, etc.
When the master branch is pushed to on GitHub, Buddy (the service) picks up on that change and runs a pipeline of stuff. That goes like 1) Deploy over SFTP to Flywheel hosting 2) Clear the cache at Cloudflare 3) Send a notification over Slack.
Flywheel isn’t just the local development, they are an awesome WordPress host. Cloudflare sits in front of it just for extra performance and protection.
#177: Local WordPress Development to Production Workflow originally published on CSS-Tricks, which is part of the DigitalOcean family. You should get the newsletter.
]]>Building a Full-Stack Serverless Application with Cloudflare Workers originally published on CSS-Tricks, which is part of the DigitalOcean family. You should get the newsletter.
]]>That being said, if you’re new to serverless, it may be unclear how to translate the things that you already know into a new paradigm. If you’re a front-end developer, you may have no experience with what serverless purports to abstract away from you – so how do you even get started?
Today, I’ll try to help demystify the practical part of working with serverless by taking a project from idea to production, using Cloudflare Workers. Our project will be a daily leaderboard, called “Repo Hunt” inspired by sites like Product Hunt and Reddit, where users can submit and upvote cool open-source projects from GitHub and GitLab. You can see the final version of the site, published here.

Workers is a serverless application platform built on top of Cloudflare’s network. When you publish a project to Cloudflare Workers, it’s immediately distributed across 180 (and growing) cities around the world, meaning that regardless of where your users are located, your Workers application will be served from a nearby Cloudflare server with extremely low latency. On top of that, the Workers team has gone all-in on developer experience: our newest release, at the beginning of this month, introduced a fully-featured command line tool called Wrangler, which manages building, uploading, and publishing your serverless applications with a few easy-to-learn and powerful commands.
The end result is a platform that allows you to simply write JavaScript and deploy it to a URL – no more worrying about what “Docker” means, or if your application will fall over when it makes it to the front page of Hacker News!
If you’re the type that wants to see the project ahead of time, before hopping into a long tutorial, you’re in luck! The source for this project is available on GitHub. With that, let’s jump in to the command-line and build something rad.
Installing Wrangler and preparing our workspace
Wrangler is the command-line tool for generating, building, and publishing Cloudflare Workers projects. We’ve made it super easy to install, especially if you’ve worked with npm before:
npm install -g @cloudflare/wranglerOnce you’ve installed Wrangler, you can use the generate command to make a new project. Wrangler projects use “templates” which are code repositories built for re-use by developers building with Workers. We maintain a growing list of templates to help you build all kind of projects in Workers: check out our Template Gallery to get started!
In this tutorial, we’ll use the “Router” template, which allows you to build URL-based projects on top of Workers. The generate command takes two arguments: first, the name of your project (I’ll use repo-hunt), and a Git URL. This is my favorite part of the generate command: you can use all kinds of templates by pointing Wrangler at a GitHub URL, so sharing, forking, and collaborating on templates is super easy. Let’s run the generate command now:
wrangler generate repo-hunt https://github.com/cloudflare/worker-template-router
cd repo-hunt
The Router template includes support for building projects with webpack, so you can add npm modules to your project, and use all the JavaScript tooling you know and love. In addition, as you might expect, the template includes a Router class, which allows you to handle routes in your Worker, and tie them to a function. Let’s look at a simple example: setting up an instance of Router, handling a GET request to /, and returning a response to the client:
// index.js
const Router = require('./router')

addEventListener('fetch', event => {
  event.respondWith(handleRequest(event.request))
})

async function handleRequest(request) {
  try {
    const r = new Router()
    r.get('/', () => new Response("Hello, world!"))
    const resp = await r.route(request)
    return resp
  } catch (err) {
    return new Response(err)
  }
}
All Workers applications begin by listening to the fetch event, which is an incoming request from a client to your application. Inside of that event listener, it’s common practice to call a handleRequest function, which looks at the incoming request and determines how to respond. When handling an incoming fetch event, which indicates an incoming request, a Workers script should always return a Response back to the user: it’s a similar request/response pattern to many web frameworks, like Express, so if you’ve worked with web frameworks before, it should feel quite familiar!
In our example, we’ll make use of a few routes: a “root” route (/), which will render the homepage of our site; a form for submitting new repos, at /post, and a special route for accepting POST requests, when a user submits a repo from the form, at /repo.
Building a route and rendering a template
The first route that we’ll set up is the “root” route, at the path /. This will be where repos submitted by the community will be rendered. For now, let’s get some practice defining a route, and returning plain HTML. This pattern is common enough in Workers applications that it makes sense to understand it first, before we move on to some more interesting bits!
To begin, we’ll update index.js to set up an instance of a Router, handle any GET requests to /, and call the function index, from handlers/index.js (more on that shortly):
// index.js
const Router = require('./router')
const index = require('./handlers/index')

addEventListener('fetch', event => {
  event.respondWith(handleRequest(event.request))
})

function handleRequest(request) {
  try {
    const r = new Router()
    r.get('/', index)
    return r.route(request)
  } catch (err) {
    return new Response(err)
  }
}
As with the example index.js in the previous section, our code listens for a fetch event, and responds by calling the handleRequest function. The handleRequest function sets up an instance of Router, which will call the index function on any GET requests to /. With the router setup, we route the incoming request, using r.route, and return it as the response to the client. If anything goes wrong, we simply wrap the content of the function in a try/catch block, and return the err to the client (a note here: in production applications, you may want something more robust here, like logging to an exception monitoring tool).
To continue setting up our route handler, we’ll create a new file, handlers/index.js, which will take the incoming request and return a HTML response to the client:
// handlers/index.js
const headers = { 'Content-Type': 'text/html' }
const handler = () => {
  return new Response("Hello, world!", { headers })
}
module.exports = handler
Our handler function is simple: it returns a new instance of Response with the text “Hello, world!” as well as a headers object that sets the Content-Type header to text/html – this tells the browser to render the incoming response as an HTML document. This means that when a client makes a GET request to the route /, a new HTML response will be constructed with the text “Hello, world!” and returned to the user.
Wrangler has a preview function, perfect for testing the HTML output of our new function. Let’s run it now to ensure that our application works as expected:
wrangler previewThe preview command should open up a new tab in your browser, after building your Workers application and uploading it to our testing playground. In the Preview tab, you should see your rendered HTML response:

With our HTML response appearing in browser, let’s make our handler function a bit more exciting, by returning some nice looking HTML. To do this, we’ll set up a corresponding index “template” for our route handler: when a request comes into the index handler, it will call the template and return an HTML string, to give the client a proper user interface as the response. To start, let’s update handlers/index.js to return a response using our template (and, in addition, set up a try/catch block to catch any errors, and return them as the response):
// handlers/index.js
const headers = { 'Content-Type': 'text/html' }
const template = require('../templates/index')

const handler = async () => {
  try {
    return new Response(template(), { headers })
  } catch (err) {
    return new Response(err)
  }
}

module.exports = handler
As you might imagine, we need to set up a corresponding template! We’ll create a new file, templates/index.js, and return an HTML string, using ES6 template strings:
// templates/index.js
const template = () => {
  return <code><h1>Hello, world!</h1>`
}

module.exports = template
Our template function returns a simple HTML string, which is set to the body of our Response, in handlers/index.js. For our final snippet of templating for our first route, let’s do something slightly more interesting: creating a templates/layout.js file, which will be the base “layout” that all of our templates will render into. This will allow us to set some consistent styling and formatting for all the templates. In templates/layout.js:
// templates/layout.js
const layout = body => `
<!doctype html>
<html>
<head>
<meta charset="UTF-8">
<title>Repo Hunt</title>
<meta name="viewport" content="width=device-width, initial-scale=1">
<link rel="stylesheet" href="https://cdnjs.cloudflare.com/ajax/libs/bulma/0.7.5/css/bulma.min.css">
</head>
<body>
<div class="container">
<div class="navbar">
<div class="navbar-brand">
Repo Hunt
</div>
<div class="navbar-menu">
<div class="navbar-end">
<div class="navbar-item">
Post a repository
</div>
</div>
</div>
</div>
<div class="section">
${body}
</div>
</div>
</body>
</html>
`
module.exports = layoutThis is a big chunk of HTML code, but breaking it down, there’s only a few important things to note: first, this layout variable is a function! A body variable is passed in, intended to be included inside of a div right in the middle of the HTML snippet. In addition, we include the Bulmahttps://bulma.io) CSS frameworkhttps://bulma.io), for a bit of easy styling in our project, and a navigation bar, to tell users *what* this site is, with a link to submit new repositories.
To use our layout template, we’ll import it in templates/index.js, and wrap our HTML string with it:
// templates/index.js
const layout = require('./layout')

const template = () => {
  return layout(`<h1>Hello, world!</h1>`)
}

module.exports = template
With that, we can run wrangler preview again, to see our nicely rendered HTML page, with a bit of styling help from Bulma:

Storing and retrieving data with Workers KV
Most web applications aren’t very useful without some sort of data persistence. Workers KV is a key-value store built for use with Workers – think of it as a super-fast and globally distributed Redis. In our application, we’ll use KV to store all of the data for our application: each time a user submits a new repository, it will be stored in KV, and we’ll also generate a daily array of repositories to render on the home page.
A quick note: at the time of writing, usage of Workers KV requires a paid Workers plan. Read more in the “Pricing” section of the Workers docs here.
Inside of a Workers application, you can refer to a pre-defined KV namespace, which we’ll create inside of the Cloudflare UI, and bind to our application once it’s been deployed to the Workers application. In this tutorial, we’ll use a KV namespace called REPO_HUNT, and as part of the deployment process, we’ll make sure to attach it to our application, so that any references in the code to REPO_HUNT will correctly resolve to the KV namespace.
Before we hop into creating data inside of our namespace, let’s look at the basics of working with KV inside of your Workers application. Given a namespace (e.g. REPO_HUNT), we can set a key with a given value, using put:
const string = "Hello, world!"
REPO_HUNT.put("myString", string)
We can also retrieve the value for that key, by using async/await and waiting for the promise to resolve:
const getString = async () => {
  const string = await REPO_HUNT.get("myString")
  console.log(string) // "Hello, world!"
}
The API is super simple, which is great for web developers who want to start building applications with the Workers platform, without having to dive into relational databases or any kind of external data service. In our case, we’ll store the data for our application by saving:
- A repo object, stored at the key
repos:$id, where$idis a generated UUID for a newly submitted repo. - A day array, stored at the key
$date(e.g."6/24/2019"), containing a list of repo IDs, which indicate the submitted repos for that day.
We’ll begin by implementing support for submitting repositories, and making our first writes to our KV namespace by saving the repository data in the object we specified above. Along the way, we’ll create a simple JavaScript class for interfacing with our store – we’ll make use of that class again, when we move on to rendering the homepage, where we’ll retrieve the repository data, build a UI, and finish our example application.
Allowing user-submitted data
No matter what the application is, it seems that web developers always end up having to write forms. In our case, we’ll build a simple form for users to submit repositories.
At the beginning of this tutorial, we set up index.js to handle incoming GET requests to the root route (`/). To support users adding new repositories, we’ll add another route, GET /post, which will render a form template to users. In index.js:
// index.js

// ...

const post = require('./handlers/post')

// ...

function handleRequest(request) {
  try {
    const r = new Router()
    r.get('/', index)
    r.get('/post', post)
    return r.route(request)
  } catch (err) {
    return new Response(err)
  }
}
In addition to a new route handler in index.js, we’ll also add handlers/post.js, a new function handler that will render an associated template as an HTML response to the user:
// handlers/post.js
const headers = { 'Content-Type': 'text/html' }
const template = require('../templates/post')

const handler = request => {
  try {
    return new Response(template(), { headers })
  } catch (err) {
    return new Response(err)
  }
}

module.exports = handler
The final piece of the puzzle is the HTML template itself – like our previous template example, we’ll re-use the layout template we’ve built, and wrap a simple three-field form with it, exporting the HTML string from templates/post.js:
// templates/post.js
const layout = require('./layout')

const template = () =>
  layout(`
  <div>
    <h1>Post a new repo</h1>
    <form action="/repo" method="post">
      <div class="field">
        <label class="label" for="name">Name</label>
        <input class="input" id="name" name="name" type="text" placeholder="Name" required></input>
      </div>
      <div class="field">
        <label class="label" for="description">Description</label>
        <input class="input" id="description" name="description" type="text" placeholder="Description"></input>
      </div>
      <div class="field">
        <label class="label" for="url">URL</label>
        <input class="input" id="url" name="url" type="text" placeholder="URL" required></input>
      </div>
      <div class="field">
        <div class="control">
          <button class="button is-link" type="submit">Submit</button>
        </div>
      </div>
    </form>
  </div>
<code>)

module.exports = template
Using wrangler preview, we can navigate to the path /post and see our rendered form:

If you look at the definition of the actual form tag in our template, you’ll notice that we’re making a POST request to the path /repo. To receive the form data, and persist it into our KV store, we’ll go through the process of adding another handler. In index.js:
// index.js

// ...

const create = require('./handlers/create')

// ...

function handleRequest(request) {
  try {
    const r = new Router()
    r.get('/', index)
    r.get('/post', post)
    r.post('/repo', create)
    return r.route(request)
  } catch (err) {
    return new Response(err)
  }
}
When a form is sent to an endpoint, it’s sent as a query string. To make our lives easier, we’ll include the qs library in our project, which will allow us to simply parse the incoming query string as a JS object. In the command line, we’ll add qs simply by using npm. While we’re here, let’s also install the node-uuid package, which we’ll use later to generate IDs for new incoming data. To install them both, use npm’s install --save subcommand:
npm install --save qs uuidWith that, we can implement the corresponding handler function for POST /repo. In handlers/create.js:
// handlers/create.js
const qs = require('qs')

const handler = async request => {
  try {
    const body = await request.text()

    if (!body) {
      throw new Error('Incorrect data')
    }

    const data = qs.parse(body)

    // TODOs:
    // - Create repo
    // - Save repo
    // - Add to today's repos on the homepage

    return new Response('ok', { headers: { Location: '/' }, status: 301 })
  } catch (err) {
    return new Response(err, { status: 400 })
  }
}

module.exports = handler
Our handler function is pretty straightforward — it calls text on the request, waiting for the promise to resolve to get back our query string body. If no body element is provided with the request, the handler throws an error (which returns with a status code of 400, thanks to our try/catch block). Given a valid body, we call parse on the imported qs package, and get some data back. For now, we’ve stubbed out our intentions for the remainder of this code: first, we’ll create a repo, based on the data. We’ll save that repo, and then add it to the array of today’s repos, to be rendered on the home page.
To write our repo data into KV, we’ll build two simple ES6 classes, to do a bit of light validation and define some persistence methods for our data types. While you could just call REPO_HUNT.put directly, if you’re working with large amounts of similar data, it can be nice to do something like new Repo(data).save() – in fact, we’ll implement something almost exactly like this, so that working with a Repo is incredibly easy and consistent.
Let’s define store/repo.js, which will contain a Repo class. With this class, we can instantiate new Repo objects, and using the constructor method, we can pass in data, and validate it, before continuing to use it in our code.
// store/repo.js
const uuid = require('uuid/v4')

class Repo {
  constructor({ id, description, name, submitted_at, url }) {
    this.id = id || uuid()
    this.description = description

    if (!name) {
      throw new Error(`Missing name in data`)
    } else {
      this.name = name
    }

    this.submitted_at = submitted_at || Number(new Date())

    try {
      const urlObj = new URL(url)
      const whitelist = ['github.com', 'gitlab.com']

      if (!whitelist.some(valid => valid === urlObj.host)) {
        throw new Error('The URL provided is not a repository')
      }
    } catch (err) {
      throw new Error('The URL provided is not valid')
    }

    this.url = url
  }

  save() {
    return REPO_HUNT.put(`repos:${this.id}`, JSON.stringify(this))
  }
}

module.exports = Repo
Even if you aren’t super familiar with the constructor function in an ES6 class, this example should still be fairly easy to understand. When we want to create a new instance of a Repo, we pass the relevant data to constructor as an object, using ES6‘s destructuring assignment to pull each value out into its own key. With those variables, we walk through each of them, assigning this.$key (e.g. this.name, this.description, etc) to the passed-in value.
Many of these values have a “default” value: for instance, if no ID is passed to the constructor, we’ll generate a new one, using our previously-saved uuid package’s v4 variant to generate a new UUID, using uuid(). For submitted_at, we’ll generate a new instance of Date and convert it to a Unix timestamp, and for url, we’ll insure that the URL is both valid *and* is from github.com or gitlab.com to ensure that users are submitting genuine repos.
With that, the save function, which can be called on an instance of Repo, inserts a JSON-stringified version of the Repo instance into KV, setting the key as repos:$id. Back in handlers/create.js, we’ll import the Repo class, and save a new Repo using our previously parsed data:
// handlers/create.js

// ...

const Repo = require('../store/repo')

const handler = async request => {
  try {
    // ...

    const data = qs.parse(body)
    const repo = new Repo(data)
    await repo.save()

    // ...
  } catch (err) {
    return new Response(err, { status: 400 })
  }
}

// ...
With that, a new Repo based on incoming form data should actually be persisted into Workers KV! While the repo is being saved, we also want to set up another data model, Day, which contains a simple list of the repositories that were submitted by users for a specific day. Let’s create another file, store/day.js, and flesh it out:
// store/day.js
const today = () => new Date().toLocaleDateString()
const todayData = async () => {
  const date = today()
  const persisted = await REPO_HUNT.get(date)
  return persisted ? JSON.parse(persisted) : []
}

module.exports = {
  add: async function(id) {
    const date = today()
    let ids = await todayData()
    ids = ids.concat(id)
    return REPO_HUNT.put(date, JSON.stringify(ids))
  }
}
Note that the code for this isn’t even a class — it’s an object with key-value pairs, where the values are functions! We’ll add more to this soon, but the single function we’ve defined, add, loads any existing repos from today’s date (using the function today to generate a date string, used as the key in KV), and adds a new Repo, based on the id argument passed into the function. Back inside of handlers/create.js, we’ll make sure to import and call this new function, so that any new repos are added immediately to today’s list of repos:
// handlers/create.js

// ...

const Day = require('../store/day')

// ...

const handler = async request => {
  try {

    // ...

    await repo.save()
    await Day.add(repo.id)

    return new Response('ok', { headers: { Location: '/' }, status: 301 })
  } catch (err) {
    return new Response(err, { status: 400 })
  }
}

// ...
Our repo data now persists into KV and it’s added to a listing of the repos submitted by users for today’s date. Let’s move on to the final piece of our tutorial, to take that data, and render it on the homepage.
Rendering data
At this point, we’ve implemented rendering HTML pages in a Workers application, as well as taking incoming data, and persisting it to Workers KV. It shouldn’t surprise you to learn that taking that data from KV, and rendering an HTML page with it, our homepage, is quite similar to everything we’ve done up until now. Recall that the path / is tied to our index handler: in that file, we’ll want to load the repos for today’s date, and pass them into the template, in order to be rendered. There’s a few pieces we need to implement to get that working – to start, let’s look at handlers/index.js:
// handlers/index.js

// ...
const Day = require('../store/day')

const handler = async () => {
  try {
    let repos = await Day.getRepos()
    return new Response(template(repos), { headers })
  } catch (err) {
    return new Response(`Error! ${err} for ${JSON.stringify(repos)}`)
  }
}

// ...
While the general structure of the function handler should stay the same, we’re now ready to put some genuine data into our application. We should import the Day module, and inside of the handler, call await Day.getRepos to get a list of repos back (don’t worry, we’ll implement the corresponding functions soon). With that set of repos, we pass them into our template function, meaning that we’ll be able to actually render them inside of the HTML.
Inside of Day.getRepos, we need to load the list of repo IDs from inside KV, and for each of them, load the corresponding repo data from KV. In store/day.js:
// store/day.js

const Repo = require('./repo')

// ...

module.exports = {
  getRepos: async function() {
    const ids = await todayData()
    return ids.length ? Repo.findMany(ids) : []
  },

  // ...
}
The getRepos function reuses our previously defined todayData function, which returns a list of ids. If that list has *any* IDs, we want to actually retrieve those repositories. Again, we’ll call a function that we haven’t quite defined yet, importing the Repo class and calling Repo.findMany, passing in our list of IDs. As you might imagine, we should hop over to store/repo.js, and implement the accompanying function:
// store/repo.js

class Repo {
  static findMany(ids) {
    return Promise.all(ids.map(Repo.find))
  }

  static async find(id) {
    const persisted = await REPO_HUNT.get(`repos:${id}`)
    const repo = JSON.parse(persisted)
    return persisted ? new Repo({ ...repo }) : null
  }

  // ...
}
To support finding all the repos for a set of IDs, we define two class-level or static functions, find and findMany which uses Promise.all to call find for each ID in the set, and waits for them all to finish before resolving the promise. The bulk of the logic, inside of find, looks up the repo by its ID (using the previously-defined key, repos:$id), parses the JSON string, and returns a newly instantiated instance of Repo.
Now that we can look up repositories from KV, we should take that data and actually render it in our template. In handlers/index.js, we passed in the repos array to the template function defined in templates/index.js. In that file, we’ll take that repos array, and render chunks of HTML for each repo inside of it:
// templates/index.js

const layout = require('./layout')
const dateFormat = submitted_at =>
  new Date(submitted_at).toLocaleDateString('en-us')

const repoTemplate = ({ description, name, submitted_at, url }) =>
  `<div class="media">
      <div class="media-content">
        <p>
          ${name}
        </p>
        <p>
          ${description}
        </p>
        <p>

            Submitted ${dateFormat(submitted_at)}
        </p>
      </div>
    </div>
  `

const template = repos => {
  const renderedRepos = repos.map(repoTemplate)

  return layout(`
  <div>
    ${
      repos.length
        ? renderedRepos.join('')
        : `<p>No repos have been submitted yet!</p>`
    }
  </div>
`)
}

module.exports = template
Breaking this file down, we have two primary functions: template (an updated version of our original exported function), which takes an array of repos, maps through them, calling repoTemplate, to generate an array of HTML strings. If repos is an empty array, the function simply returns a p tag with an empty state. The repoTemplate function uses destructuring assignment to set the variables description, name, submitted_at, and url from inside of the repo object being passed to the function, and renders each of them into fairly simple HTML, leaning on Bulma’s CSS classes to quickly define a media object layout.
And with that, we’re done writing code for our project! After coding a pretty comprehensive full-stack application on top of Workers, we’re on the final step: deploying the application to the Workers platform.
Deploying your site to workers.dev
Every Workers user can claim a free Workers.dev subdomain, after signing up for a Cloudflare account. In Wrangler, we’ve made it super easy to claim and configure your subdomain, using the subdomain subcommand. Each account gets one Workers.dev subdomain, so choose wisely!
wrangler subdomain my-cool-subdomainWith a configured subdomain, we can now deploy our code! The name property in wrangler.toml will indicate the final URL that our application will be deployed to: in my codebase, the name is set to repo-hunt, and my subdomain is signalnerve.workers.dev, so my final URL for my project will be repo-hunt.signalnerve.workers.dev. Let’s deploy the project, using the publish command:
wrangler publishBefore we can view the project in browser, we have one more step to complete: going into the Cloudflare UI, creating a KV namespace, and binding it to our project. To start this process, log into your Cloudflare dashboard, and select the “Workers” tab on the right side of the page.

Inside of the Workers section of your dashboard, find the “KV” menu item, and create a new namespace, matching the namespace you used in your codebase (if you followed the code samples, this will be REPO_HUNT).

In the listing of KV namespaces, copy your namespace ID. Back in our project, we’ll add a `kv-namespaces` key to our `wrangler.toml`, to use our new namespace in the codebase:
# wrangler.toml
[[kv-namespaces]]
binding = "REPO_HUNT"
id = "$yourNamespaceId"
To make sure your project is using the new KV namespace, publish your project one last time:
wrangler publishWith that, your application should be able to successfully read and write from your KV namespace. Opening my project’s URL should show the final version of our project — a full, data-driven application without needing to manage any servers, built entirely on the Workers platform!

What’s next?
In this tutorial, we built a full-stack serverless application on top of the Workers platform, using Wrangler, Cloudflare’s command-line tool for building and deploying Workers applications. There’s a ton of things that you could do to continue to add to this application: for instance, the ability to upvote submissions, or even to allow comments and other kinds of data. If you’d like to see the finished codebase for this project, check out the GitHub repo!
The Workers team maintains a constantly growing list of new templates to begin building projects with – if you want to see what you can build, make sure to check out our Template Gallery. In addition, make sure to check out some of the tutorials in the Workers documentation, such as building a Slack bot, or a QR code generator.
If you went through the whole tutorial (or if you’re building cool things you want to share), I’d love to hear about how it went on Twitter. If you’re interested in serverless and want to keep up with any new tutorials I’m publishing, make sure to join my newsletter and subscribe to my YouTube channel!
Building a Full-Stack Serverless Application with Cloudflare Workers originally published on CSS-Tricks, which is part of the DigitalOcean family. You should get the newsletter.
]]>Here’s the notice that …
Switching Your Site to HTTPS on a Shoestring Budget originally published on CSS-Tricks, which is part of the DigitalOcean family. You should get the newsletter.
]]>
Here’s the notice that landed in my inbox:

If your site URL does not support HTTPS, then this notice directly affects you. Even if your site does not have forms, moving over to HTTPS should be a priority, as this is only one step in Google’s strategy to identify insecure sites. They state this clearly in their message:
The new warning is part of a long term plan to mark all pages served over HTTP as “not secure”.

The problem is that the process of installing SSL certificates and transitioning site URLs from HTTP to HTTPS—not to mention editing all those links and linked images in existing content—sounds like a daunting task. Who has time and wants to spend the money to update a personal website for this?
I use GitHub Pages to host a number sites and projects for free—including some that use custom domain names. To that end, I wanted to see if I could quickly and inexpensively convert a site from HTTP to HTTPS. I wound up finding a relatively simple solution on a shoestring budget that I hope will help others. Let’s dig into that.
Enforcing HTTPS on GitHub Pages
Sites hosted on GitHub Pages have a simple setting to enable HTTPS. Navigate to the project’s Settings and flip the switch to enforce HTTPS.

But We Still Need SSL
Sure, that first step was a breeze, but it’s not the full picture of what we need to do to meet Google’s definition of a secure site. The reason is that enabling the HTTPS setting neither provides nor installs a Secure Sockets Layer (SSL) certificate to a site that uses a custom domain. Sites that use the default web address provided by GitHub Pages are fully secure with that setting, but those of us that use a custom domain have to go the extra step of securing SSL at the domain level.
That’s a bummer because SSL, while not super expensive, is yet another cost and likely one you may not want to incur when you’re trying to keep costs down. I wanted to find a way around this.
We Can Get SSL From a CDN … for Free!
This is where Cloudflare comes in. Cloudflare is a Content Delivery Network (CDN) that also provides distributed domain name server services. What that means is that we can leverage their network to set up HTTPS. The real kicker is that they have a free plan that makes this all possible.
It’s worth noting that there are a number of good posts here on CSS-Tricks that tout the benefits of a CDN. While we’re focused on the security perks in this post, CDNs are an excellent way to help reduce server burden and increase performance.
From here on out, I’m going to walk through the steps I used to connect Cloudflare to GitHub Pages so, if you haven’t already, you can snag a free account and follow along.
Step 1: Select the “+ Add Site” option
First off, we have to tell Cloudflare that our domain exists. Cloudflare will scan the DNS records to verify both that the domain exists and that the public information about the domain are accessible.

Step 2: Review the DNS records
After Cloudflare has scanned the DNS records, it will spit them out and display them for your review. Cloudflare indicates that it believes things are in good standing with an orange cloud in the Status column. Review the report and confirm that the records match those from your registrar. If all is good, click “Continue” to proceed.

Step 3: Get the Free Plan
Cloudflare will ask what level of service you want to use. Lo and behold! There is a free option that we can select.

Step 4: Update the Nameservers
At this point, Cloudflare provides us with its server addresses and our job is to head over to the registrar where the domain was purchased and paste those addresses into the DNS settings.

It’s not incredibly difficult to do this, but can be a little unnerving. Your registrar likely has instructions for how to do this. For example, here are GoDaddy’s instructions for updating nameservers for domains registered through their service.
Once you have done this step, your domain will effectively be mapped to Cloudflare’s servers, which will act as an intermediary between the domain and GitHub Pages. However, it is a bit of a waiting game and can take Cloudflare up to 24 hours to process the request.
If you are using GitHub Pages with a subdomain instead of a custom domain, there is one extra step you are required to do. Head over to your GitHub Pages settings and add a CNAME record in the DNS settings. Set it to point to <your-username>.github.io, where <your-username> is, of course, your GitHub account handle. Oh, and you will need to add a CNAME text file to the root of your GitHub project which is literally a text file named CNAME with your domain name in it.
Here is a screenshot with an example of adding a GitHub Pages subdomain as a CNAME record in Cloudflare’s settings:

Step 5: Enable HTTPS in Cloudflare
Sure, we’ve technically already done this in GitHub Pages, but we’re required to do it in Cloudflare as well. Cloudflare calls this feature “Crypto” and it not only forces HTTPS, but provides the SSL certificate we’ve been wanting all along. But we’ll get to that in just a bit. For now, enable Crypto for HTTPS.

Turn on the “Always use HTTPS” option:
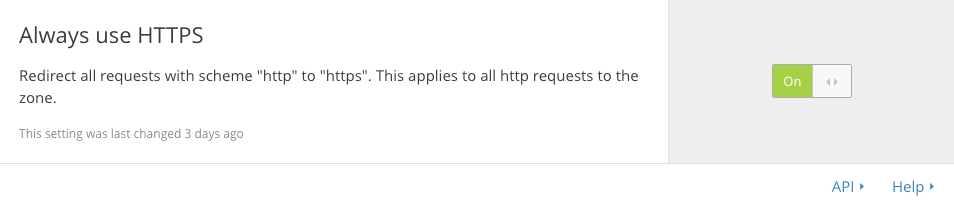
Now any HTTP request from a browser is switched over to the more secure HTTPS. We’re another step closer to making Google Chrome happy.
Step 6: Make Use of the CDN
Hey, we’re using a CDN to get SSL, so we may as well take advantage of its performance benefits while we’re at it. We can speed up performance by reducing files automatically and extend browser cache expiration.
Select the “Speed” option in the settings and allow Cloudflare to auto minify our site’s web assets:

We can also set the expiration on browser cache to maximize performance:

By moving the expiration out date a longer than the default option, the browser will refrain itself from asking for a site’s resources with each and every visit—that is, resources that more than likely haven’t been changed or updated. This will save visitors an extra download on repeat visits within a month’s time.
Step 7: Make External Resource Secure
If you use external resources on your site (and many of us do), then those need to be served securely as well. For example, if you use a Javascript framework and it is not served from an HTTP source, that blows our secure cover as far as Google Chrome is concerned and we need to patch that up.
If the external resource you use does not provide HTTPS as a source, then you might want to consider hosting it yourself. We have a CDN now that makes the burden of serving it a non-issue.
Step 8: Activate SSL
Woot, here we are! SSL has been the missing link between our custom domain and GitHub Pages since we enabled HTTPS in the GitHub Pages setting and this is where we have the ability to activate a free SSL certificate on our site, courtesy of Cloudflare.
From the Crypto settings in Cloudflare, let’s first make sure that the SSL certificate is active:

If the certificate is active, move to “Page Rules” in the main menu and select the “Create Page Rule” option:

…then click “Add a Setting” and select the “Always use HTTPS” option:

After that click “Save and Deploy” and celebrate! We now have a fully secure site in the eyes of Google Chrome and didn’t have to touch a whole lot of code or drop a chunk of change to do it.
In Conclusion
Google’s push for HTTPS means front-end developers need to prioritize SSL support more than ever, whether it’s for our own sites, company sites, or client sites. This move gives us one more incentive to make the move and the fact that we can pick up free SSL and performance enhancements through the use of a CDN makes it all the more worthwhile.
Have you written about your adventures moving to HTTPS? Let me know in the comments and we can compare notes. Meanwhile, enjoy a secure and speedy site!
Switching Your Site to HTTPS on a Shoestring Budget originally published on CSS-Tricks, which is part of the DigitalOcean family. You should get the newsletter.
]]>We Put Hundreds of Our Client Sites Behind a CDN, and It Worked Out Really Well originally published on CSS-Tricks, which is part of the DigitalOcean family. You should get the newsletter.
]]>
I learned three surprising things:
- In our case, the biggest benefit to being behind a CDN is actually not performance or security, but rather the “DNS abstraction layer”, a concept I’ll explain below.
- Moving to a CDN was a difficult process for us, but only because we have a high domain-to-staff ratio. For a single site, it would be a breeze.
- There are no worries about media files 404’ing; no urls need to change. In other words, the common concern about missing post-content images and such is not an issue for us.
Surprised? I was. Without further ado, Josh explains it all.
The Interview
What was the “point A to point B”? In other words, what were we doing, and what are we doing now?
Point A was private hosting with a technology company and no CDN. Point B is hosting with WP Engine, behind CloudFlare’s CDN.
Was the problem with point A our hosting, or the lack of a CDN?
Both, sort of. Our top cause of downtime was malicious traffic that our hosting environment was not positioned to handle. Also, our server response times consistently hovered at around two seconds. Response times should be under half a second, and two seconds should be nearing a complete page load!
This, combined with other business factors, forced us to switch hosts, but the lack of a CDN made this process far more difficult than it would be now that we’re on one. If we ever need to migrate again, it will be much easier.
Wait, why? What does a CDN have to do with migrating hosts?
Migrating to new servers requires DNS changes. Because of our high domain-to-staff ratio, this makes for a lot of manual work. It’s made even more difficult in situations where our clients manage their own DNS settings.
By getting all our site onto a CDN’s name servers, we gained an abstraction layer between our domains and our hosting — a very good abstraction layer. Unlike GoDaddy, where most of our domains are registered, CloudFlare has an API for managing DNS as well as an easy interface to use browser automation. If we ever need to switch hosts again, it will be very easy to change our DNS settings through CloudFlare. It will be completely automated, and completely transparent to our clients, even the ones who manage their own domains.
I always thought the point of using a CDN was to serve files faster.
For some websites that are more media-heavy, that’s true, but not for us. Most of our content is pretty light on media files. For us, the real value in having a CDN is the DNS abstraction layer.
That’s not to say there is no performance benefit for us. We’re far less susceptible to DDOS attacks, because far fewer requests even make it to our host! That’s a combination of CloudFlare’s caching, and their reputation-based DDoS protection.
Why CloudFlare over other CDN’s?
There are many CDNs, but there are few products that compete with CloudFlare directly and none that I’m aware of are as affordable. Since we weren’t looking for just a CDN, but the benefits above as well, CloudFlare was the obvious choice.
Personally my own WordPress multisite has been running with CloudFlare in front for years, so I had the experience to be confident in using them at work. They also have an excellent reputation among the technology companies that we work with.
So, did it work? Any data to help illustrate?
When CloudFlare redesigned their app earlier this year, we lost the ability to see combined analytics from our domains, but you can view the analytics for individual sites in a CloudFlare account at `https://www.cloudflare.com/a/analytics/example.com`. The results are most pronounced on our busiest sites.
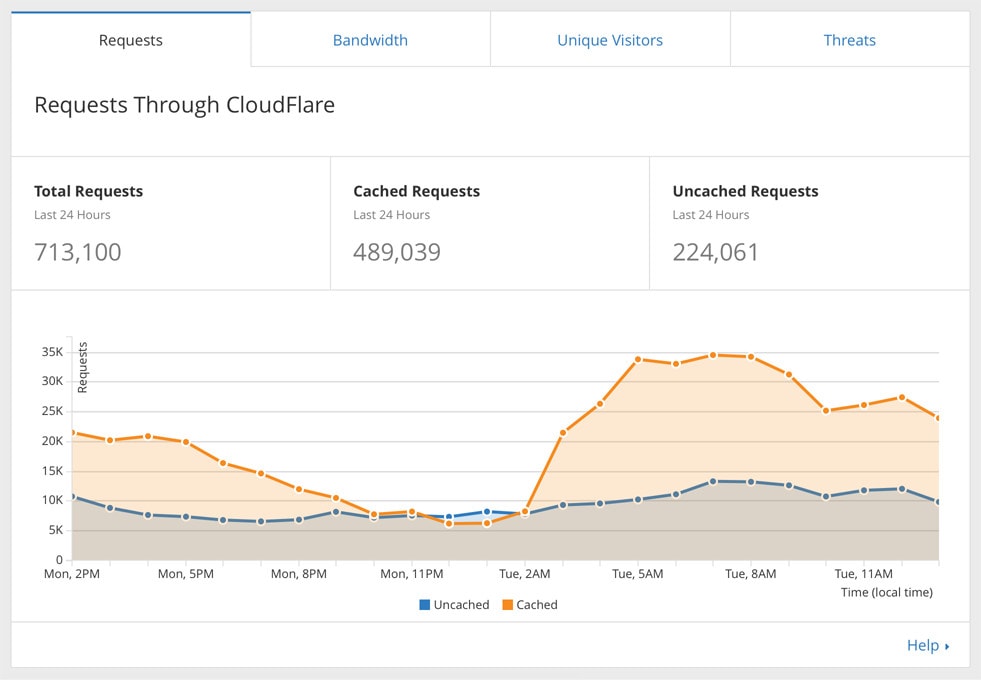
Stats for one of our busiest domains, demonstrating that only a fraction of requests even make it to our host. Most are served via CloudFlare’s cache.
How did we get this done exactly? We had to go into our Godaddy account and change the DNS settings on all our domains to point to CloudFlare, with no API access, and probably a 300:1 domain-to-staff ratio? That sounds terrible. How did I miss this?
You’re right, it was a pretty big project we started in October 2014 as we prepared to migrate hosting. Fortunately with some browser automation and manual labor, changing all of the nameservers to CloudFlare for the domains we controlled was the easy part.
What did we do with browser automation, and what did we do with manual labor?
Fake, an easy to use browser automation tool, added domains to CloudFlare and collected the nameserver assignments (if I remember correctly you can’t programmatically add new domains to CloudFlare). For our domains in GoDaddy, our labor crew changed the nameservers to the ones assigned by CloudFlare from when Fake added and recorded the domain names.
And you’re saying that was the easy part?
Yes! In cases where clients control their nameservers, it was the usual challenge of coordinating any DNS record change, but with the upside that future DNS record changes could then be managed by us.
What is the challenge associated with that, exactly?
People have a hard time understanding the domain name system and records. And domain registrars complicate things with difficult user interfaces and using different (but accurate) terms for the same things. If you are busy like our clients and don’t understand something, you’ll have a hard time prioritizing and completing it.
A big challenge was that after you add a domain to CloudFlare, you have 14 days to change your nameservers, otherwise you have to re-add the domain to your CloudFlare account (and you may not get the same nameserver assignment again). Which brings me to the next challenge: CloudFlare tries to give domains within an account the same nameservers, but it’s not guaranteed. So we had to carefully craft our email campaigns to list the correct domain(s) a client needed to update as well as the matching nameservers they should switch to as well as emphasize the importance of changing within the 14 day window! I believe it took three rounds of nameserver assignments, each with two or three email campaigns to remind clients to change, in order to get the majority switched.
Who were you emailing, and how? Do we have a list to the tech/marketing rep for each client or something? Or is this a CRM thing or what?
We exported contacts from our CRM and also from Whois lookups!
Man. How long did all this take?
My memory is already sadly fuzzy and we were not time tracking back then, so I could only estimate the man hours as dozens, possibly over 100. We did get almost all of the client-controlled domains switched in addition to all the domains we already managed through GoDaddy.
So, once we had all of our domains pointing to CloudFlare, what happened next? CloudFlare was still pointing to our old host, correct?
Correct, so we pointed all of our domains in CloudFlare to WP Engine. We were able to programmatically change the A record IP addresses in minutes when we needed to with CloudFlare’s API.
So, wait, what? We did a large API call to CloudFlare to change A record IP addresses? When? How? Who wrote the API client? Or was this a task somehow handled by the Fake engine?
We made thousands of requests to the API with some basic desktop scripts I made over Christmas break that year. This enabled us to make thousands of record deletions, edits and additions in minutes rather than hours of manual changes or Fake automation.
I’m still surprised that, for us, a CDN was more about DNS abstraction than performance. It makes sense, but by that same logic, aren’t we now tightly coupled with CloudFlare? It would be another giant undertaking to migrate away from them if we need to.
That’s true, but it seems far less likely for the presence of a CDN to be a problem, compared to the myriad things that can go wrong with hosting. Also, CloudFlare is a very stable partner. By this time next year, they’ll probably have an IPO.
Whenever I hear about CDN migrations, I always hear about headaches with media file urls needing to change, or images in the post content 404’ing. We didn’t have that problem, and I notice that our images don’t point to CloudFlare. What’s going on?
With CloudFlare, You don’t have to serve media files from other domains like you do with traditional CDNs because you change your domain’s nameservers to CloudFlare’s. Then CloudFlare uses Anycast to point your domain to their nearest data center to serve the files they’ve automatically cached. In their own words:
CloudFlare operates out of 76 data centers around the world. Our CDN automatically caches your static files at our edge nodes so these files are stored closer to your visitors while delivering your dynamic content directly from your web server. CloudFlare then uses a technology called Anycast to route your visitors to the nearest data center. The result is that your website, on average, loads twice as fast for your visitors regardless of where they are located. https://www.cloudflare.com/features-cdn/
To what degree was this move difficult, simply due to our insanely low staff to client/domain ratio, compared to most agencies? Is it fair to say that this would have been really freaking easy if, say, for example, we literally just managed one high-traffic website?
Correct, the majority of the complexity was due to the logistics of managing hundreds of domains and helping hundreds of clients update the nameservers on domains they registered. Switching to CloudFlare is very easy with a single domain, though you do need to be careful with settings to prevent issues.
I’m going to attempt to re-state the process in my own words.
- We have lots of websites. For some of them, we control their DNS settings via GoDaddy. For others, the client retains control, via their domain name registrar of choice.
- We used Fake, humans, and API calls to manage the domain pointing and setting. For domains out of our control, we had to wrangle our clients via several rounds of email, sent to a list gathered via CRM and Whois.
- No worries about media file urls or anything because of the simple fact that with CloudFlare, you change your nameservers to point to them.
- The difficulty for a single site would be trivial. Any appreciable hardship on this move came as a result of our high domain:staff ratio.
Is that accurate? Anything to add or take away?
Correct! You should switch your domains over to CloudFlare too to check out the process.
Let’s See if I can Figure This Out Myself.
Challenge accepted. I generally understand the process that Josh explained, and I’m going to try it on my own WordPress multisite, which has two domain names, scottfennell.org and scottfennell.com.
I open an account with CloudFlare and also log into my BlueHost account, which is my domain registrar. Well, this is pretty easy. CloudFlare prompts me to enter my domain names, and then treats to a video explaining, more or less, what Josh explained above.

They claim in the video, which is about a minute long, that the video takes longer than the migration process. They were right. All I had to do was note the nameservers that CloudFlare assigned me, and update them in BlueHost. I’m done. I’m on CloudFlare now (or, I will be once the changes propagate).
I suppose the more interesting topic, is so what? Is my site any faster? Unlike most of our sites at work, my site has tons of large images. It’s basically a high-res photo gallery. Pre CloudFlare, this page took about 3.1 seconds to load, uncached: http://scottfennell.com/turkey/suphan-dagi/. With CloudFlare active, it’s taking about 2.2. Pages with more media are even more accelerated, and where I’ve enabled page-caching, I’m getting to DOM ready in about 300ms. If you’re curious to inspect the network panel yourself:
- Has page-caching: http://scottfennell.com/turkey/
- Does not have page-caching: http://scottfennell.com/japan/
Check out these analytics, after just a few days behind CloudFlare:

One interesting side-efftect: Some of the image galleries on my website display the images in random order. Behind CloudFlare’s page-caching, I’m getting the same order on each page load, since it caches the output the first time a given url loads. Similarly, at work, it would create a lot of confusion with our clients if they expected to see our updated work but instead were stuck with the version that CloudFlare had cached.
I’m actually delighted by this problem, because it’s provided me with some job security: I got to write a plugin!
A WordPress Plugin to dump your CloudFlare Cache.
Here’s what it looks like:

You get two buttons. One to dump your cache, and another to enter dev mode, where caching is temporarily suspended for up to three hours. If you’re interested in using CloudFlare at an enterprise level on more than just a couple of sites, I’d highly recommend taking a look at their API and building a similar tool for your platform of choice. Sunny looks to be a very robust option for dot org, though I haven’t used it personally.
If you do roll your own, note the admirable job that CloudFlare does with integrating API docs into their web UI. Check this out, it’s sitting there begging for you to make a call:

Alternatives and Next Steps
I’ve gone from being vaguely aware and happy that we moved to CloudFlare, to being pretty damn stoked about CloudFlare. My apologies: I really had no intention of making this a CloudFlare love-fest, so allow me to point out that there are probably some alternatives, in particular one from Sucuri.
Aside from the business case for CDN’s, there’s also an opportunity for skill development. If you’re like me, you spend a lot of time off on an island in your text-editor, and it’s easy to become divorced from the process of actually serving that code in production. Spending some time learning my DNS vocab words has been a refreshing chance of pace. If that sounds like you, and you don’t have your sites behind a CDN, take a break from code for a while, and audit CloudFlare.
Scott Fennell is a WordPress theme and plugin developer in Anchorage, Alaska.
We Put Hundreds of Our Client Sites Behind a CDN, and It Worked Out Really Well originally published on CSS-Tricks, which is part of the DigitalOcean family. You should get the newsletter.
]]>